Posts by brad.

Using MYN with GTD

TWC BookIf you are a fan of both MYN and GTD, Michael Linenberger has a guide for integrating both into your workflow:

“My strong encouragement to use next actions in your MYN Now-Tasks list (see Lesson 6 in my Outlook book) is about the extent of the obvious overlap between MYN and GTD. MYN’s unique approach to task management is otherwise a quite different system. But they can easily be used together and so you can get the best of both. If you are a GTD user and are looking for more ways to integrate MYN with GTD, here are some ideas on how to do that.”

For more information on MYN and ClearContext, see our TWC partner page.  Download our free Outlook GTD setup guide here.

How to get Gmail Smart Label functionality in Outlook

Automatically file bacn out of your InboxLast week Gmail Labs released Smart Labels to automatically categorize email from bulk senders.  As Simon Mackie at Web Worker Daily points out, ClearContext provides Smart Label functionality in Outlook:

“ClearContext Personal… actually works in a similar manner to Smart Labels, filing unimportant emails, like social network notifications, newsletters, e-commerce emails and other bacn into categorized groups, taking it out of your inbox. It’s all done completely automatically, with no need to set up complex inbox rules.”

If you’re looking for a free Outlook-based alternative to Gmail’s Smart Labels, give ClearContext Personal a run.

GTD Setup and ClearContext v5.4

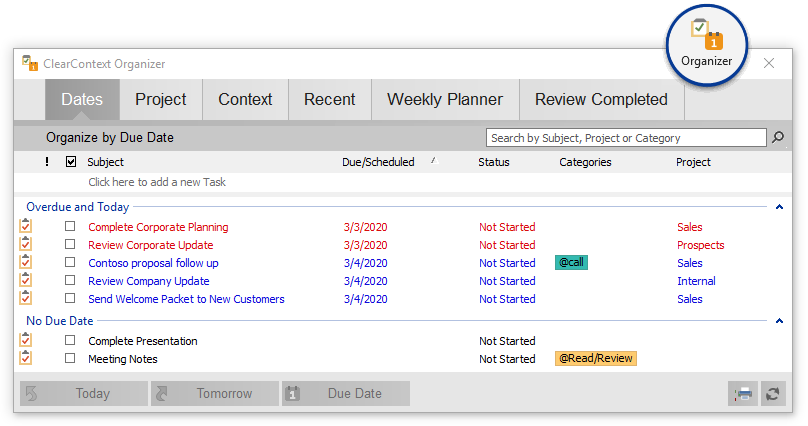
To better support our GTD customers, we introduced the Context Category dashboard in v5.4.  Now you can use the Dashboard to review your To Do’s by category, project, next action and/or date.  Here are some of the more significant changes from our GTD Setup Guide.

imageDashboard

From the Context Category view in the Summary Dashboard, double click a context to quickly jump to your action lists (@Work, @Phone, etc.) or a list of all Next Actions. From the Project view, pin the projects that are most important to you. Identify Next Actions by Project. Double click a project name to take notes and display all related tasks, appointments, contacts and files.

Inbox Processing

Process the inbox using the ClearContext workflow buttons (task, schedule, defer, etc.), answering those emails that you can, deleting those that you don’t need, filing reference material using ClearContext File buttons, and creating tasks or appointments for future work. As tasks and appointments are created, assign a category context using Outlook’s native category assignment feature and one the categories created above. This will automatically associate the item with the appropriate action list.

Work on Next Actions

Select a Context Category view from the Summary Dashboard menu (Active in the image to the left). Double-click !Next to open the Next Actions Detail Dashboard, showing all tasks designated !Next. This allows you to focus on those tasks that are most important to the progress of your Projects.

imageSummary Dashboard

The Summary Dashboard in the ClearContext Sidebar is the control panel for your day. If you close the Sidebar, access the Dashboard from the button in the toolbar or via the ClearContext menu.

Categories and Projects

The top half of the Dashboard allows you to quickly see which Context Categories or Projects require your attention. Select either a Context Category or Project view of tasks via the menu at the top right of the Dashboard (Active in the image to the right).

The Context Category view only displays categories with special characters in front of them (i.e. @Phone). The large count to the left of each category indicates the total number of due tasks. Counts highlighted in red indicate categories with overdue tasks. Double-click to open a list of all tasks for the selected category. Double-click !Next to see all tasks that have been marked as Next Actions. Double-click <Unassigned Tasks> to open the Organizer and view a list of all tasks that have not had a category assigned to them.

When viewing Projects in the Dashboard, large counts to the left of each Project give the total number of due tasks, highlighting in red those Projects with overdue tasks. Projects with Next Actions assigned show a small arrow next to the Task count.

Use the pin icon to pin your most important Projects. To view only pinned Projects, select a view from the Project header (Active in the picture to the left). Double-click <Unassigned Tasks> to view all your tasks without Project assignment. Double-click individual Projects to open a Project Dashboard.

Tasks/Appts

The Tasks and Appointments section of the Summary Dashboard shows all of your Tasks across projects and Categories. Use the filter selector in the header (All in the picture to the left) to filter by date or priority. When ready to focus on a single context (i.e. @Phone) or a single project, open a Detail Dashboard.

The Due Date and Priority buttons at the bottom of the Dashboard can be used to quickly change task information. Highlight multiple tasks and click the Due Date button to change the date due for all selected tasks. Assign Next Action, Date and Priority by right-clicking a Task.

imageDetail Dashboard

When ready to focus on an individual project or category, open the Detail Dashboard by double-clicking a Project or Context Category in the Summary Dashboard.

Category Detail

When viewing the detail for a Context Category, ClearContext displays all tasks and appointments with the current category assigned. When you’re ready to work on a single context/action list (i.e. @Phone), this is the place to do it. As in the Summary Dashboard, right click a task to assign Due Date, Start Date, Priority or Next Action.

Project Detail

In the Project Detail, add project related notes and view all tasks and appointments assigned to the Project. Use the Change menu in the Project header to quickly open pinned Projects. Click Folder to open the associated Project folder. Move or Pin a Project from the Actions menu. As in the Summary Dashboard, right click a task to assign Due Date, Start Date, Priority or Next Action.

Files and Contacts

Click the Files tab at the bottom of a Project Dashboard to view all attachments that have been emailed for this Project. Click the Contacts tab to view all Contacts you have corresponded with for this Project.

Download our complete GTD setup guide, Using ClearContext Pro for Microsoft Outlook with Getting Things Done.  See What is GTD? to learn more about the GTD system.  GTD and Getting Things Done are registered trademarks of David Allen & Company. ClearContext Corporation is not affiliated with David Allen & Company in any manner.

ClearContext v5.4: Getting Things Done with Categories

Since early releases of ClearContext, we’ve always had a significant group of passionate users who are also fans of productivity systems like Getting Things Done and Total Workday Control. We’ve had a special build customized for our TWC users for a while. We’re now pleased to announce the release of ClearContext Pro v5.4, which includes some much-requested features to better support our GTD users as well.

Review your highest priority projectsGTD users and other users who organize their tasks using special Outlook categories can download a GTD setup guide for ClearContext with detailed setup instructions.  Here’s a quick overview of some key features to help GTD users stay organized with ClearContext:

  • Context Categories – You can now manage your tasks based on either categories or projects. Select a category view on the ClearContext Summary Dashboard to display a count of tasks and appointments by context category in the dashboard, highlighting due and overdue categories.  Context categories are denoted by a special character in front of the category name (i.e. @Calls, !Next, *Phone).  
  • Category Dashboards – Double-click a context category on the Dashboard to open it in the Detail tab (formerly the Project tab).  This will show all tasks and appointments with the assigned category.  Add new tasks to the category using the Add Task function on the detail dashboard and ClearContext will automatically append the current context category to the task.
  • Next Actions -  Right click tasks in the Dashboard or Organizer to mark them as Next Actions.  A small arrow will appear next to those items you have identified as Next and a category of !Next will be assigned to the task. Use the Next Action filter on your task list in the Dashboard to see only those tasks marked !Next.

More details on these and other GTD-related features can be found in the GTD setup guide.

Upgrade ClearContextThe v5.4 upgrade is complimentary for registered v5 customers, registered v5-TWC users and active Connect members.  Download here.

GTD and Getting Things Done are registered trademarks of David Allen & Company. ClearContext Corporation is not affiliated with David Allen & Company in any manner.

Financial Times – The trouble with office email

The Financial Times mentions ClearContext in their article on ATOS Origin, a company that is going to ban email for internal communication by 2014 (must register to view):

“Conventional email programs and newer cloud-based services such as Gmail let users organise incoming email using folders and filters. But most people cannot be bothered or do not know how to set up the filters, says Sara Radicati, CEO of analyst firm Radicati Group.

That has spurred the development of “inbox management solutions” that automate the filtering.

For example, ClearContext offers a plug-in for Microsoft Exchange that highlights important email and automatically files unimportant email from automated senders. In similar vein, Google recently added a “priority intray” feature to Gmail that tries to guess which emails are most important.

Quickly Add Tasks from the Organizer in v5.3.0

ClearContext Organizer

v5.3 adds the ability to quickly add tasks from the Organizer.  Create new tasks on the fly via the Add Task box at the bottom of the window of the pane. Type the task subject and press ENTER to create the task with a date of today.  If you have instructed ClearContext to ask for a project assignment on save, the project selector will appear.  Assign a project or date via the options to the right of the Add Task text entry field.  For more detail, see our User Guide.

AutoFile Enhancements in v5.3.0

There are several new enhancements to AutoFile in our v5.3.0 release.  Here are a few excerpts from our User Guide on the changes.

Create custom autofile rulesDomain Rule Creation

Highlight a message and press the AutoFile button on the toolbar or select AutoFile from the ClearContext menu. In the dialog that appears, choose whether you want to create a sender-based rule (i.e. bacn@bulksender.net) or a domain-based rule (i.e. bulksender.net) and select the group you would like to file to. All messages in the current folder that match your rule will be filed to the group you selected.  All future messages from that sender or domain will be filed as well.

Renaming AutoFile Groups

Open ClearContext > Options > AutoFile to configure the service.  Highlight a filing group and click Change Name to rename a filing group.

Using the new Next Action features in v5.3.0

Yesterday we announced the release of v5.3.0.  One of the key new features of the release is the addition of Next Actions to support GTD processing.  Here’s an excerpt from our GTD setup guide on using the new features.

Next Actions

Use the ClearContext Dashboard to quickly identify your Next Actions; those tasks required to keep your projects moving forward.

imageMark Next Action

After you have processed your Inbox, view the ClearContext Dashboard in the Sidebar to see your task list by Project. If the Sidebar isn’t open, open it via the Dashboard button on the ClearContext toolbar or ClearContext menu.

From the Dashboard task list, right click a task to mark it as a Next Action. A small arrow will be added to the left of the task and a category of !Next will be added to it.

imageReview Next Actions by Project

Scan the Project list in the Summary Dashboard to view your active Projects. Those projects with Next Actions assigned will have a small arrow next to the total Task count. Double-click a project without a Next Action to open it. Right click the next task required to move the project forward and mark it as a Next Action. If none of the tasks listed are an appropriate next action, quickly create a new task using the Add Task entry box above the Task list.

Work on Next Actions

imageOpen the Summary Dashboard to work on your Next Actions throughout the day. On the Tasks\Appts section of the of the Summary Dashboard, select Next Actions (Category: !Next) to see only tasks that have been designated !Next. This allows you to focus on those tasks that are most important to the progress of your Projects.

For more information, download our GTD Setup Guide.

ClearContext v5.3.0 Available for Download

Review your highest priority projectsWe’re pleased to announce the release of ClearContext v5.3.0 to production!  This release adds functionality that many of our customers have been asking for; including Next Action support for those who use the GTD system and AutoFile support for renaming and creating domain rules.  Detailed features include:

Personal and Pro

  • Rename AutoFile filing groups via ClearContext > Options > AutoFile.
  • When creating an AutoFile rule, you are now given the option to select a sender or domain based rule.
  • Disabled filing groups with no unread messages are hidden from the AutoFile group list in the Dashboard.
  • Miscellaneous other performance enhancements.

Pro Only

  • Right click tasks in the Dashboard or Organizer to mark them as Next Actions.  A small arrow will appear next to those items you have identified as Next and a category of !Next will be assigned to the task.
  • Projects with Next Actions assigned will show a small arrow next to them in the Summary Dashboard.
  • Use the Next Action filter on your task list in the Dashboard to see only those tasks marked !Next.
  • Quickly add a task via the new Add Task feature at the bottom of the Organizer.

Take a gander at our updated GTD setup guide for more detail on incorporating Next Actions into your workflow.  The User Guide has been updated as well.

Upgrade ClearContextThe v5.3 upgrade is complimentary for registered v5 customers, registered v5-TWC users and active Connect members.  Download here.

ClearContext v5.2.2 Available for Download

Upgrade ClearContextWe have released v5.2.2 to improve the email statistics included in the daily digest.  Upgrade here.