The v5.1 release has introduced many new time-saving enhancements to the product. We’re posting the updated User Guide over the next few weeks.
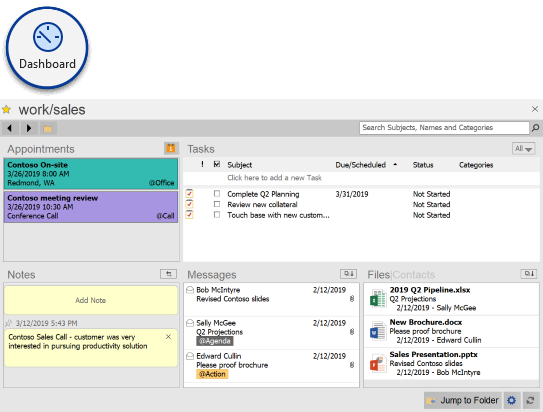
The Project Dashboard displays all notes, tasks, appointments, contacts, and attachments by Project.
 There are several ways to open a Project Dashboard:
- Double-click a Project name in the Summary Dashboard.
- Open any Project folder and click on the Project tab in the sidebar.
- From the Project tab, select Change in the header to select from a list of pinned projects or click Other Projects to open the Project selector.
Once open, the Project Dashboard is divided into three sections that can be navigated via the tabs at the bottom of the sidebar – Project Summary, Files and Contacts.
Add notes to the project and view all of your project-related tasks and appointments in the Project Summary. This section is available for Project folders, but is not present in non-Project folders (such as the Inbox). There are three buttons across the top of this pane:
 Organize launches the ClearContext Organizer in the Project tab.
- Folder opens the project folder in Outlook (if it isn’t opened already).
- Select Actions to:
- Pin the current project so that it appears in your pinned projects list in the Summary Dashboard and the Change menu.
- Move the current project. This function will reassign all notes, tasks, appointments and messages to the Project that you select.
Project Notes
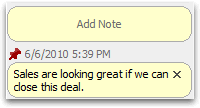 Click Add Note in the Yellow bubble at the top of the Project Summary to add a note about the project:
- Use CTRL-ENTER to add a new line.
- Press ENTER to complete the note.
- Notes are listed in descending date order. Use the pin icon
 to pin notes to the top of the list.
 - Click X to delete a note.
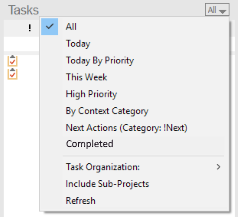 Tasks/Appointments
This section displays all Tasks and Appointments with the current Project assigned to them. Most of the options in this pane are the same as the Tasks/Appointments section of the Summary Dashboard. When adding a task from the Project dashboard, by default the current Project is assigned to the task. Select Include Sub-Projects from the Tasks/Appts menu to show tasks for the current project (i.e.MainProject) and all sub-projects of the current Project (i.e. MainProject/SubProject).
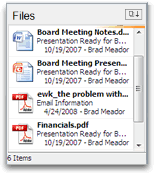
The Files section shows all attachments found in the messages that reside in the Project folder. For attachments that appear in more than one message, click the more button to see a list of all emails that contain the file.
Perform the following actions from within the Files pane:
- Double-click a file to open the most recent message to contain that attachment.
- Highlight message(s) and right click or select the Actions menu to open the message containing the attachment, open the attachment itself or forward or save the selected files.
- Sort the file listing via the Actions menu.
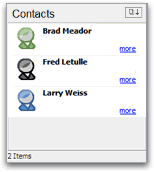 The Contacts pane shows all Contacts in the From: fields for messages that appear in the Messages pane. The colored contact icon indicates the assigned priority for the contact. For contacts that exist in the Outlook address book, click more to show additional contact details. For contacts that do not exist in the Outlook address book, click create to quickly add a record for the current sender.
Perform the following actions from within the Contacts pane:
- Double-click a contact to open the contact record. Adjust priority from here to improve Outlook prioritization.
- Highlight contact(s) and right click or select the Actions menu to email or set up an appointment with the group, export contacts to a file or create a distribution list.
- Sort the contact list via the Actions menu.
Project Management
Pin your most frequently used projects so that you can quickly open them from the Project tab.